
Step 1: Open User Administration Head to your name in the top-right corner. Click it to open the drop-down menu. Select User Administration.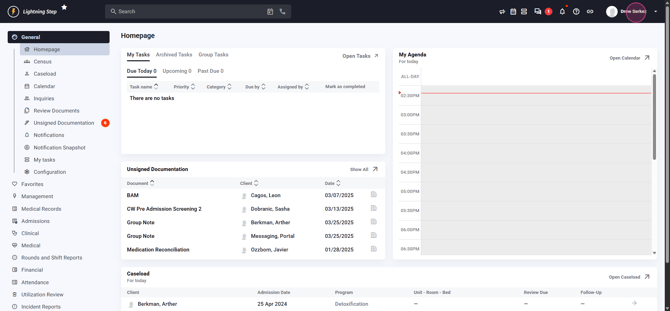
Step 2: Access the User Management Page Once you’re on the User Administration page, you’ll see all users listed.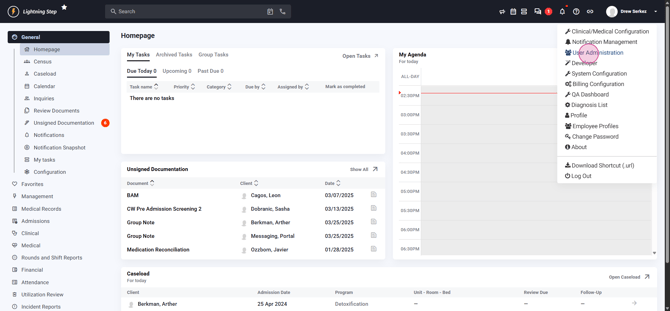
Step 3: Add a New User Click the plus icon located next to the user text at the top left. This action takes you to the new user setup page.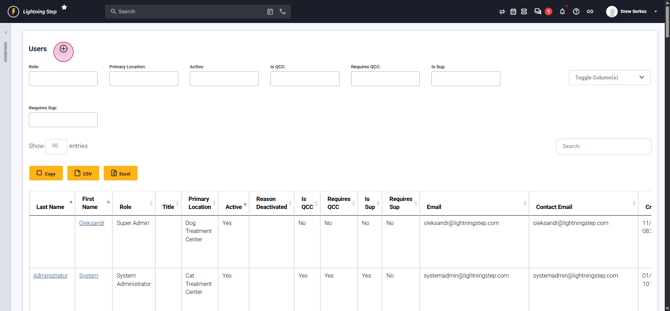
Step 4: Enter Required User Details Fill out the required fields: First Name, Last Name, and both Email and Contact Email. The user logs in with the primary email, while notifications are sent to the contact email. Only individuals are allowed as users; group accounts aren’t permitted.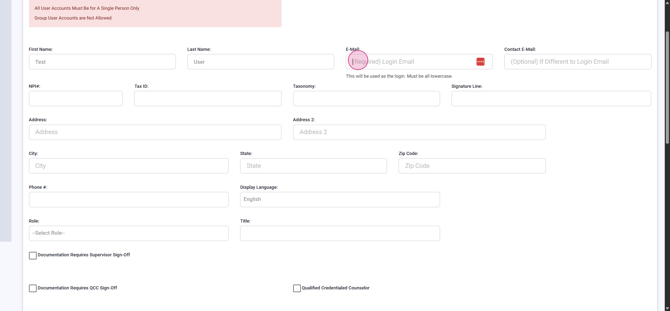
If billing under the user, also enter NPI, Tax ID, and Taxonomy details.
Step 5: Add Signature and Contact Info Provide the signature line for use in documentation. Enter the user's full name and credentials as best practice.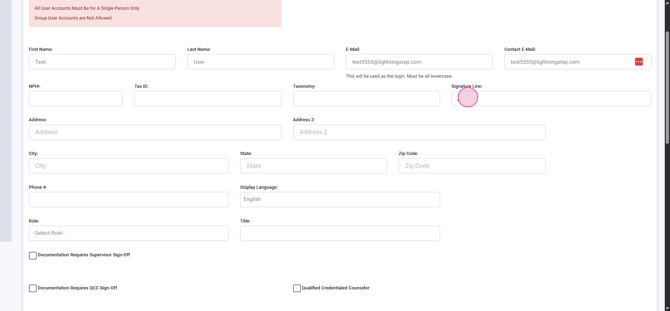
You may add address, city, state, zip, and phone, but these fields are optional.
Step 6: Assign User Role Pick a role from the list. Lightning Step allows just one role per user. Choose a role that fits the user’s job title, such as Counselor.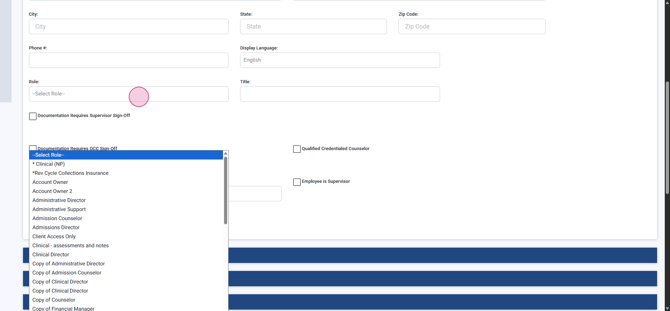
Step 7: Confirm or Edit Title
Selecting Role automatically fills the title. Adjust it if needed.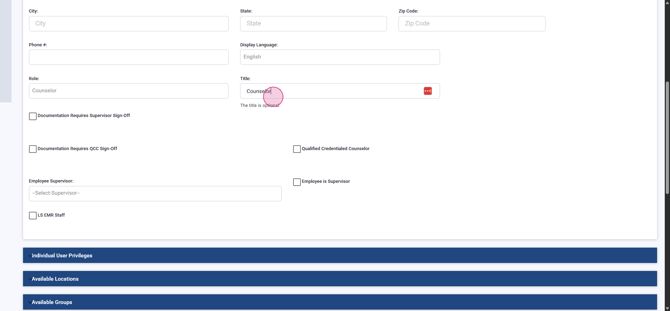
Step 8: (Optional) Set Advanced Documentation Permissions If documentation requires QCC or Supervisor sign-off, check the respective boxes: Documentation requires QCC and Supervision Sign Off.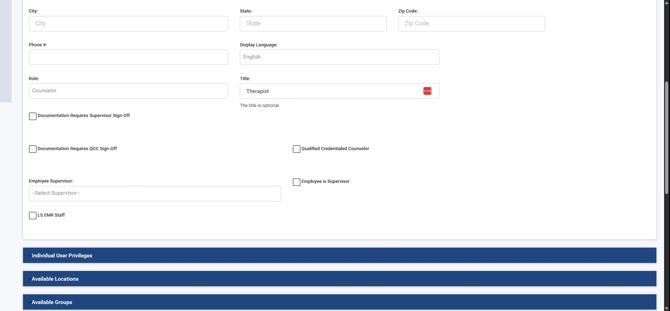
Step 9: (Optional) Grant Qualified Credential Counselor Status If the user qualifies as a Credential Counselor and can review documentation, activate Qualified Credential Counselor.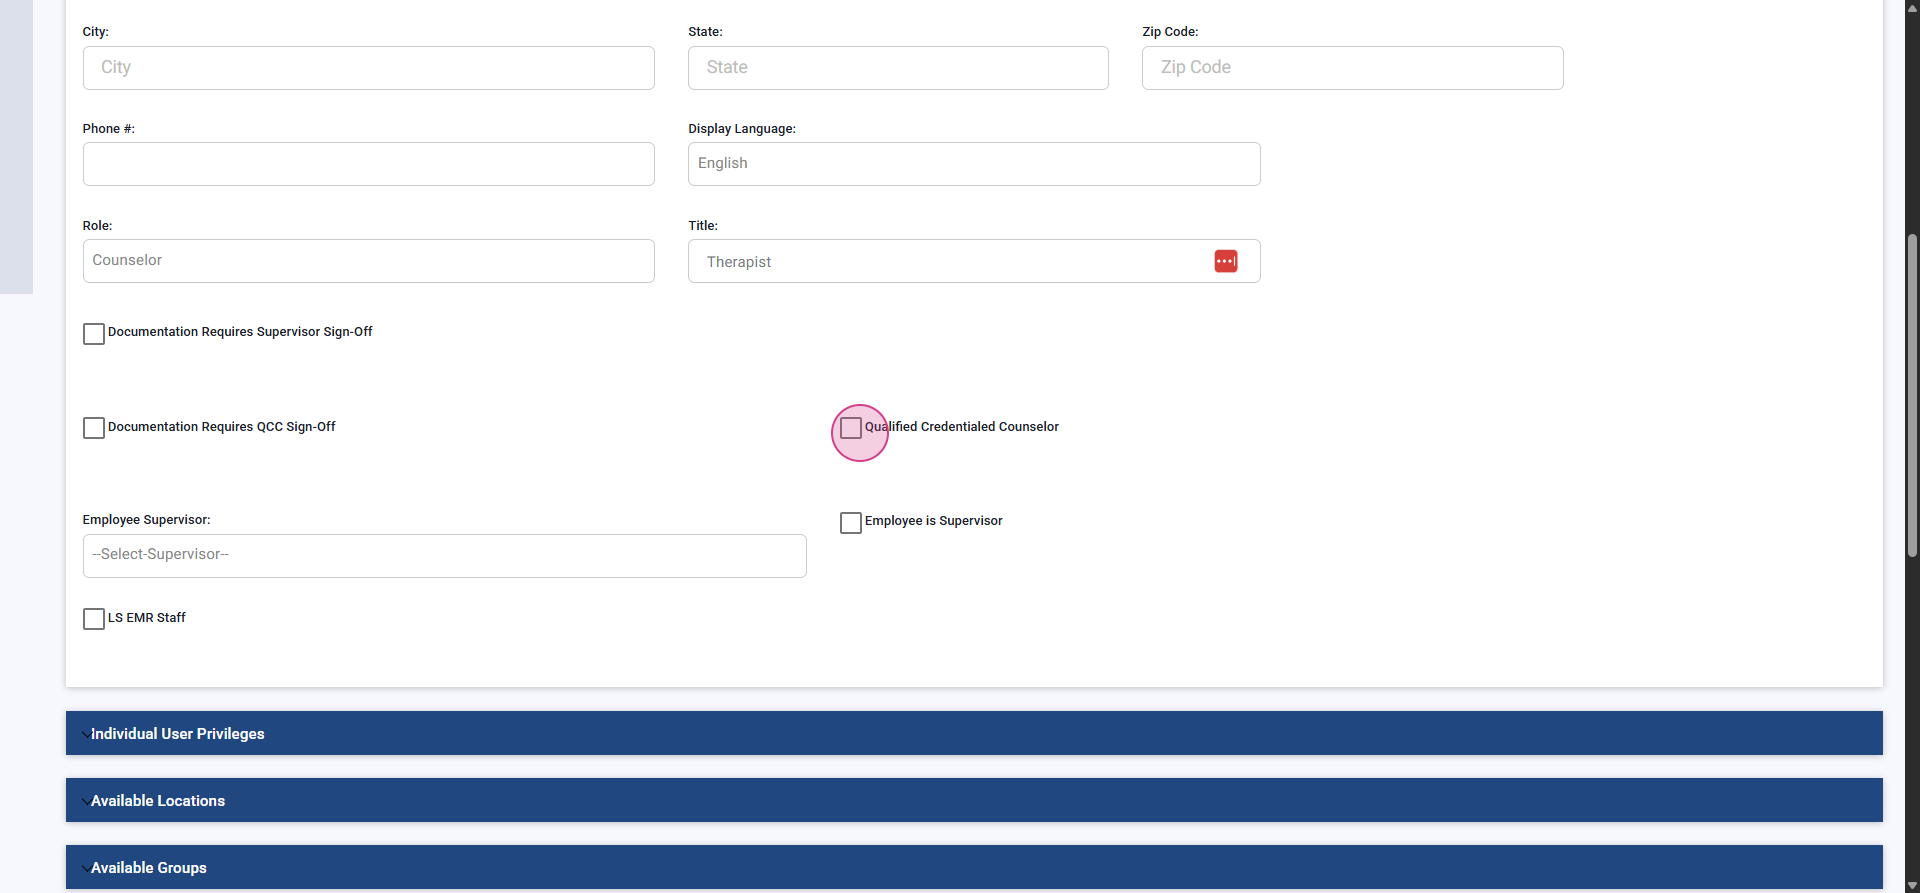
Step 10: Set Individual User Privileges Scroll to the user privileges panel and configure specific access beyond the role. After saving, additional options may appear.
- Clinical List: Adds user to clinician selection filters (such as the calendar).
- May Accept Case Assignments: Enables appearance in Case Manager Dashboard for caseload assignment.
- For User has ASAM License, Schedule Telehealth Meetings, and Use Waiting Room, check with your Lightning Step customer success or support rep.
Set the user’s discipline for categorization (optional).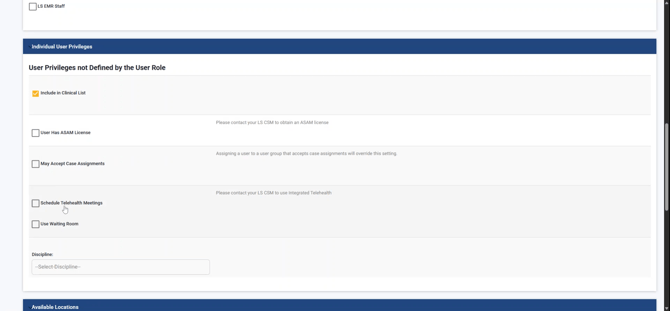
Step 11: Set Available Locations Expand the Available Locations section. At least one location must be selected as primary. Add to all new/current locations if needed.
Select the primary location from the available options.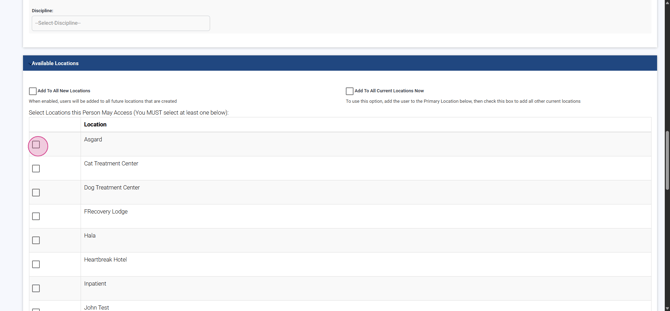
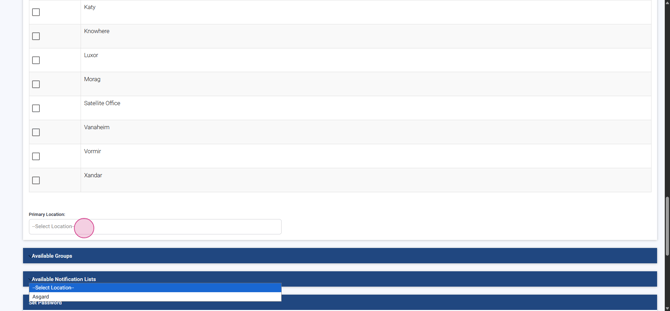
Step 12: Add User to User Groups Assign the user to a group such as Counselors to power lists and notifications.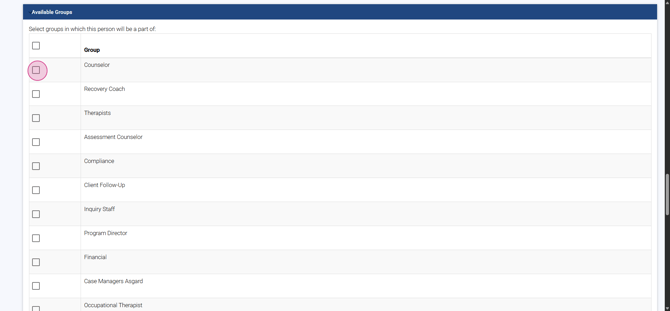
Step 13: Set Notification Lists Link the user to notification lists for events like admission, discharge, and transfer. Check out the Notification List Setting tutorial for more info.
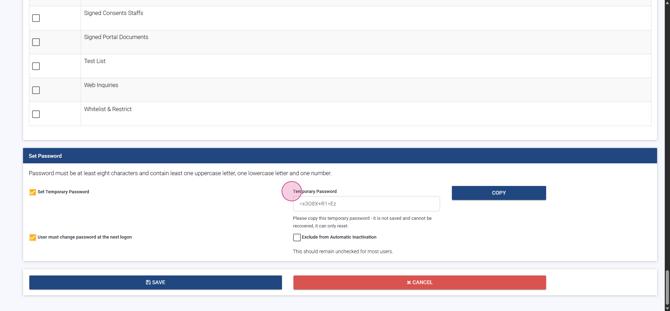
Step 14: Set the User’s Password Set a password using Set Temporary Password or manually. If you enter one manually, use at least 8 characters, including uppercase, lowercase, and a number.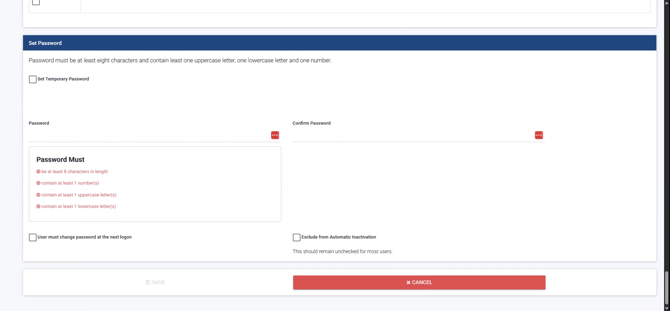
Step 15: Save the User Click Save to add the user.
Step 16: Locate the New User Use the search bar to find the newly created user and confirm creation.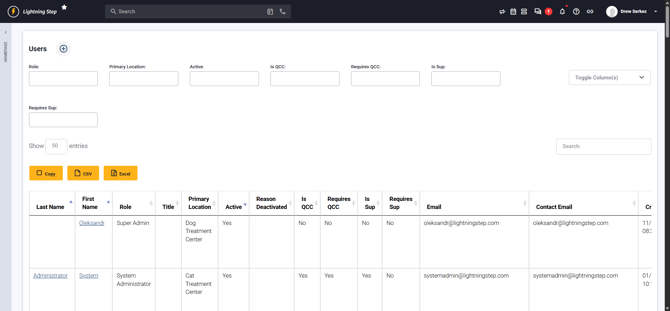
Step 17: Review User Privileges Post-Creation Select the test user you created to review new privileges. If relevant, enable User as a Physician or Prescriber to show options like: - May Order Admission - May Order Procedures - May Access Medical Dashboard - May Order Medications - May Access Protocols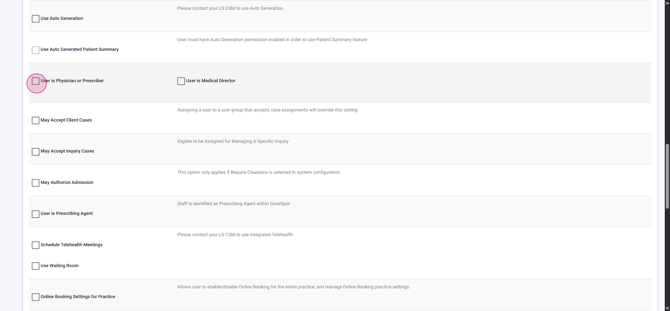
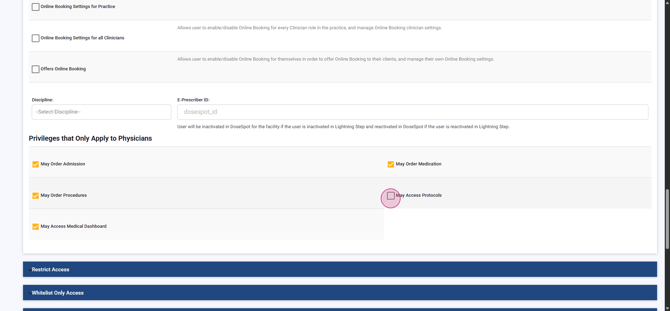
Enable User as a Prescribing Agent for non-prescriber medical staff if needed.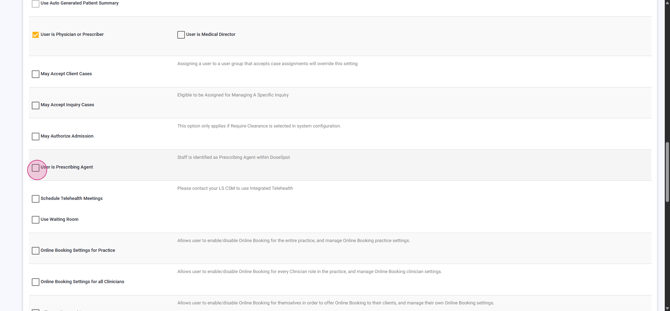
Step 18: Enable Online Booking Settings (Optional) Set up online booking controls for the entire practice, all clinicians, or just the user: - Online Booking Settings for Practice allows management of online booking across the practice.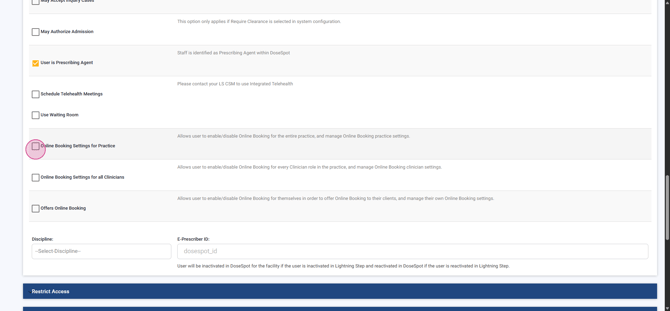
- Online Booking Settings for all Clinicians lets the user manage online booking for all clinicians.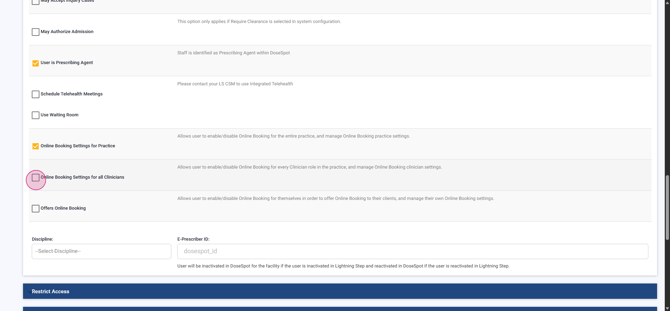
- Offers Online Booking enables the user to offer online booking to clients and control their own booking settings.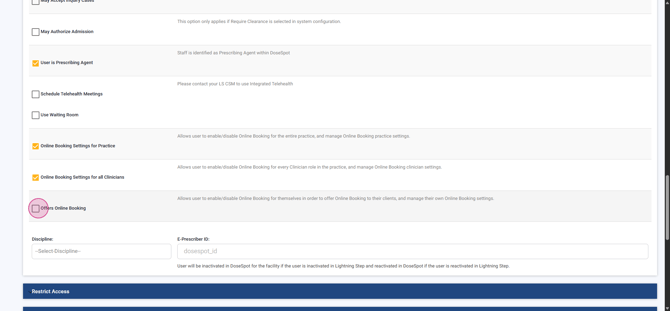
Step 19: Save Profile Updates Click Update after making changes to finish the process.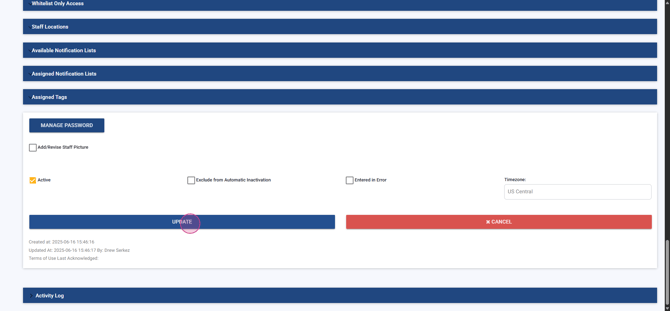
After completing these steps, the new user is ready to access Lightning Step with the permissions you assigned.