
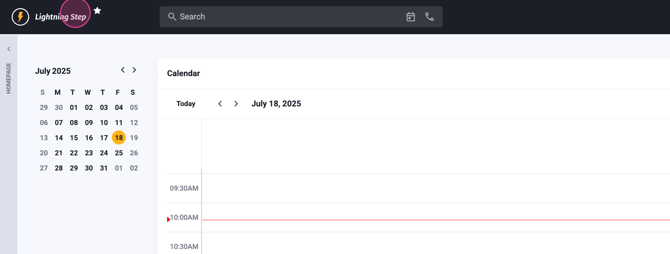
Step 1: Navigate to the Calendar tab. Here, you'll see your appointments and groups for the day.

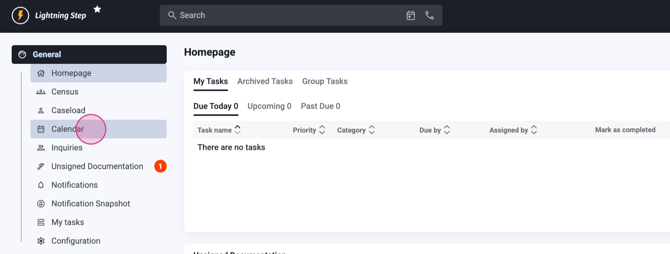
Step 2: You can also access your calendar and daily agenda under the Homepage tab, then the General tab.
Step 3: Look for the My Agenda window. At the top right of this window, you'll find the Open Calendar button.
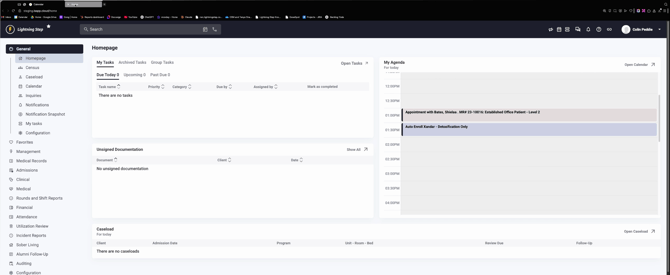
Step 4: Click on the Open Calendar button to view the entire calendar. Here, you can filter by different user groups to view everyone's calendar or just your own.
Step 5: When you have appointments or groups on your calendar, they'll appear as bubbles. Click on an appointment bubble to begin documentation.
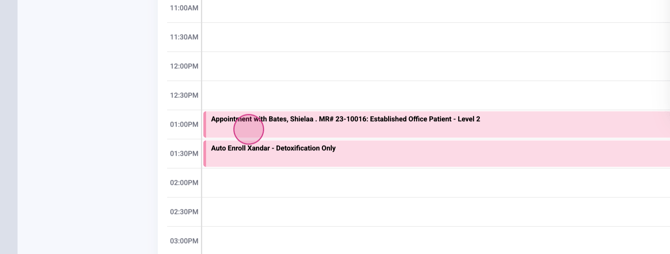
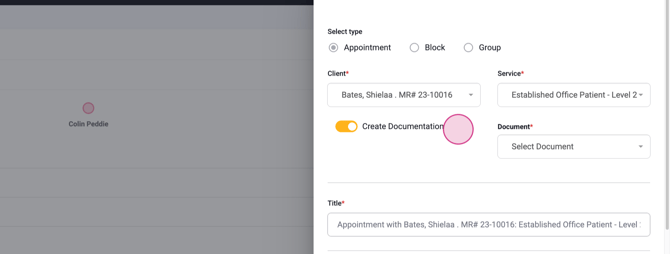
Step 6: Inside the appointment bubble, you'll find all the details of the appointment. To start documenting, click on the Create Documentation button located under the client's name.
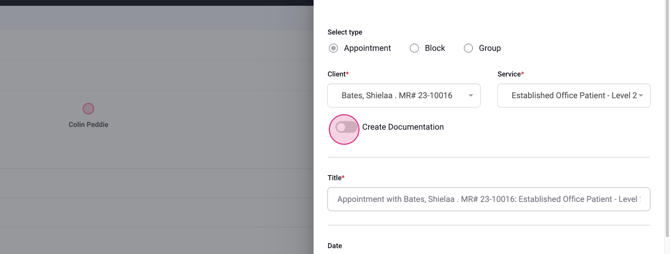
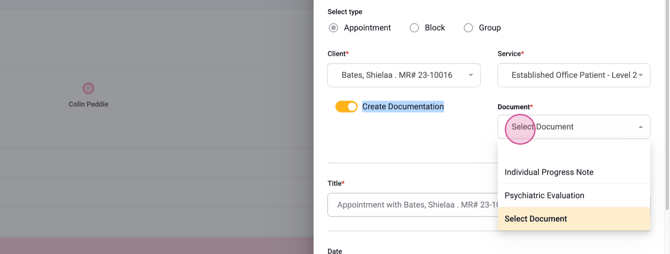
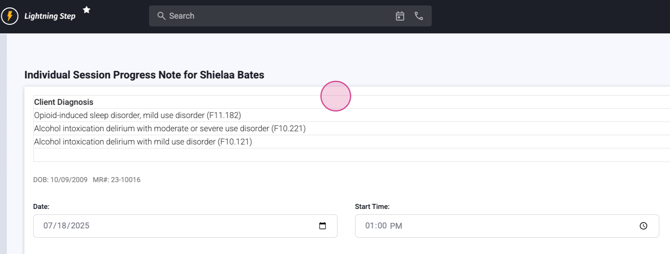
Step 7: Select a document from the list. If you're documenting an individual progress note tied to a one-to-one appointment, click on the Individual Progress Note.
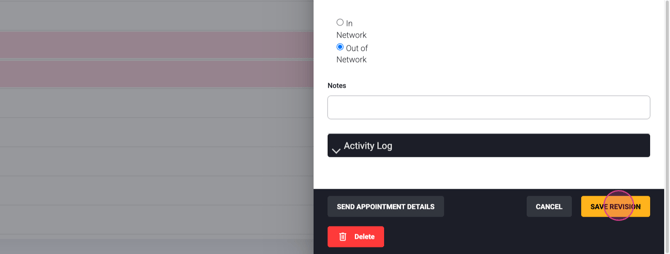
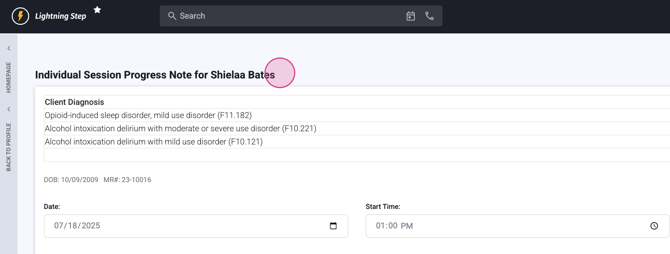
Step 8: Click on Save Revision. This will automatically generate the individual progress note tied to the client.
Step 9: To document a group session, return to the calendar and click on the group bubble.
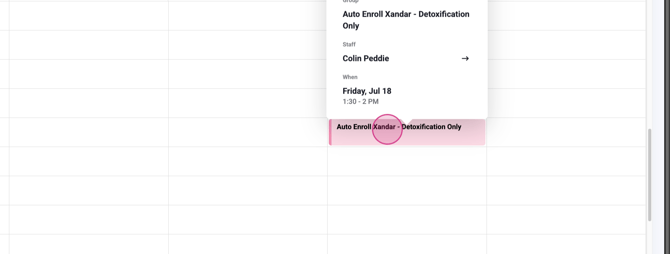
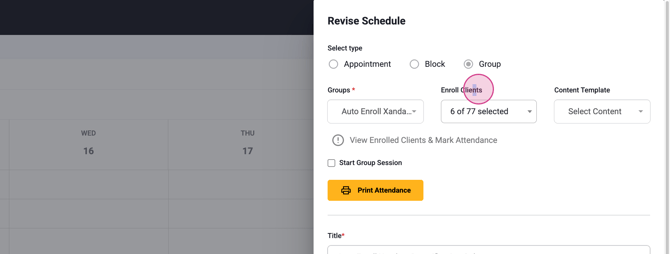
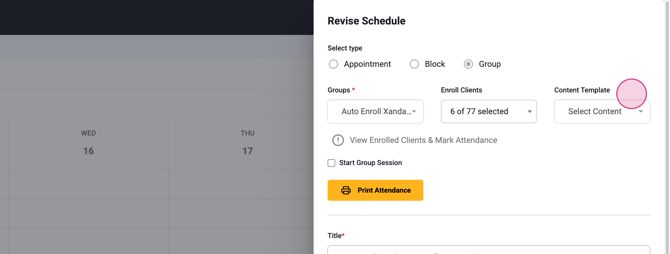
Step 10: Inside the group bubble, you'll find the group title and the number of enrolled clients. If a content template is selected, it'll be displayed here.
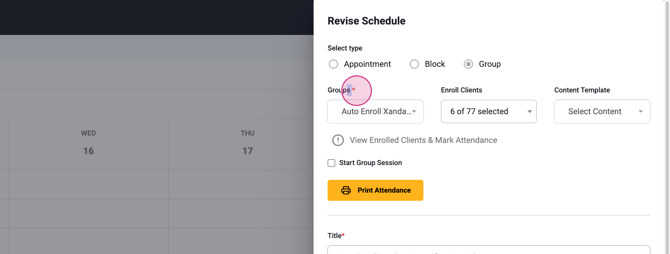
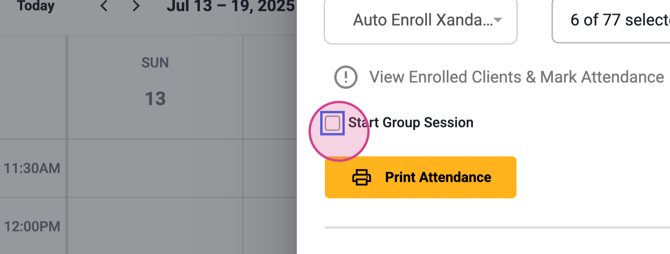
Step 11: Once everything looks good, click on the checkbox that says Start Group Session.
Step 12: Click on Save Revision. This will automatically generate the group.
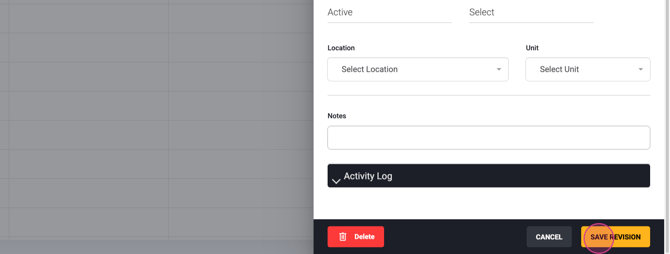
Remember, you can scroll down to mark attendance and complete the individual note section within these groups. If you have any questions, don't hesitate to ask.