
Step 1: Open the navigation menu and select Configuration.
Step 2: Click Billing Configuration.
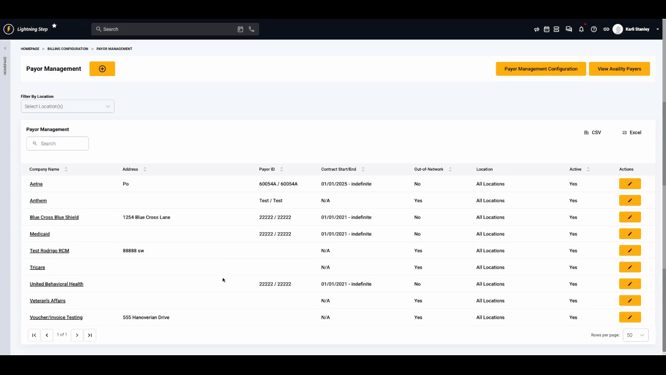
Step 3: Go to Payer Management.
Step 4: Edit the relevant payer from your list.
Step 5: Scroll to the Payer Service Information section. Existing payer services, if any, appear in a table showing their current configurations.
Step 6: Click Payer Service to open the service configuration popup.
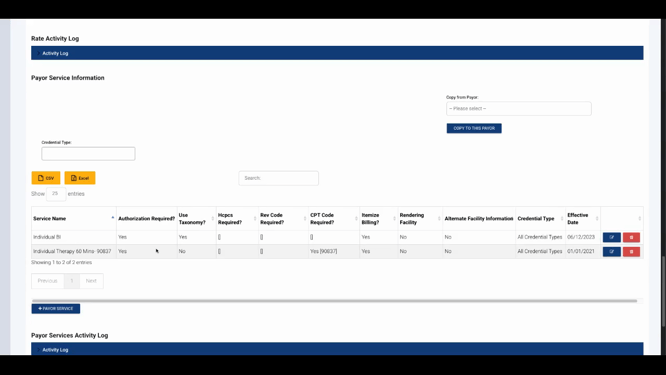
Step 7: Select a service from the dropdown menu of active services.
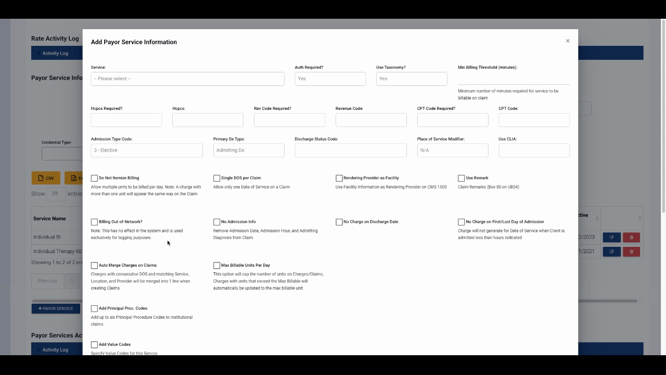
Step 8: Set default requirements for the selected service, including:
-
Authorization requirements
-
Taxonomy code inclusion
-
Minimum minute billing thresholds
-
Billing codes: HCPCs, revenues, CPT codes
-
Primary diagnosis type

Add admission and discharge codes as needed.
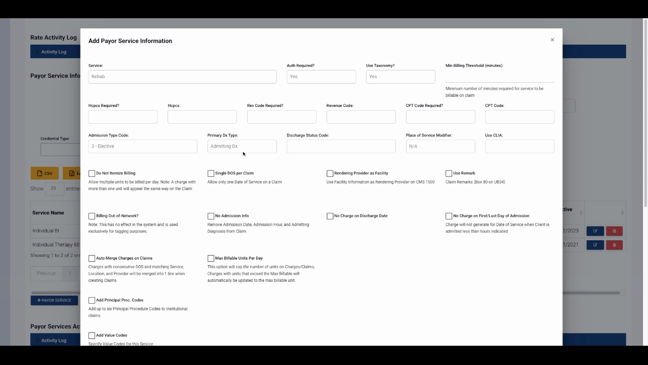
Specify the place of service and CLIA details if necessary.

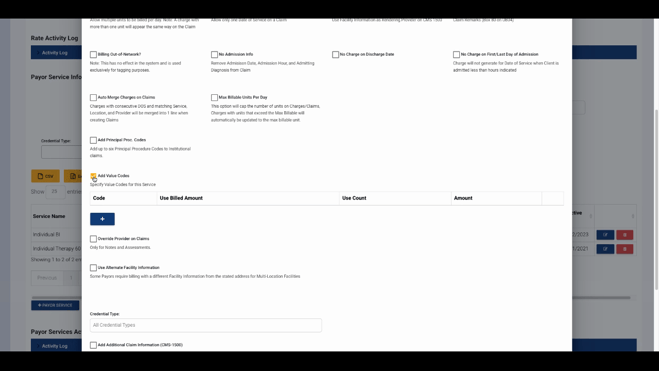
Step 9: Adjust additional options for service-payer combinations:
-
Prevent itemized billing
-
Place only one service line per claim

- Set the rendering provider as a facility - Use default remarks or mark the service as out of network - Omit admission info on the claim
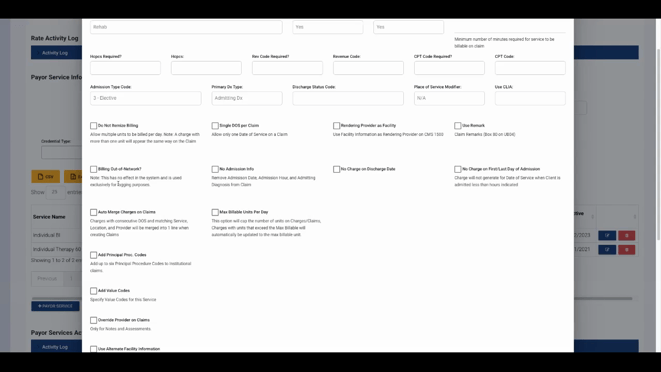
- Prevent charges on discharge or first/last admission date

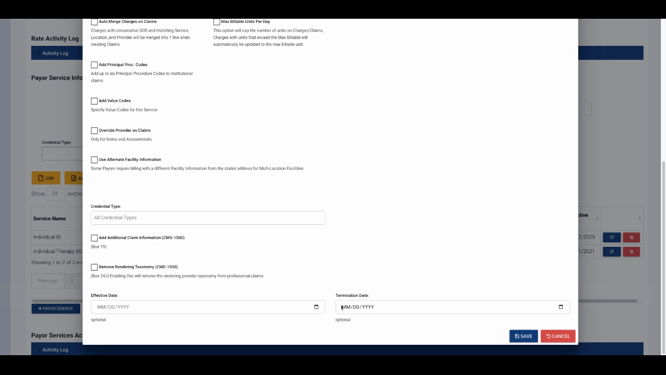
If merging charges is common, enable auto-merge for efficiency.
Step 10: Set daily maximum billable units to cap claims automatically.

Step 11: Add or update claim fields as needed:
-
Principal procedure codes
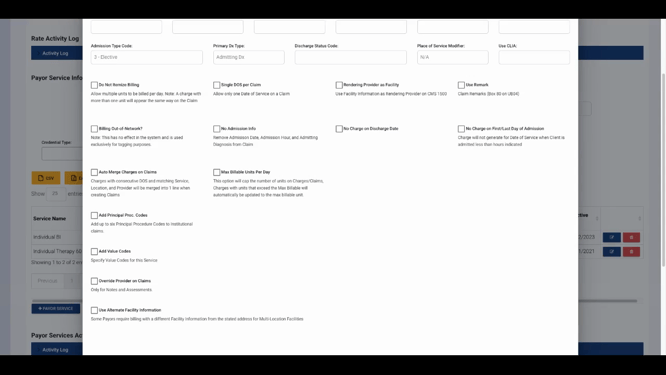
- Value codes, provider, and facility information
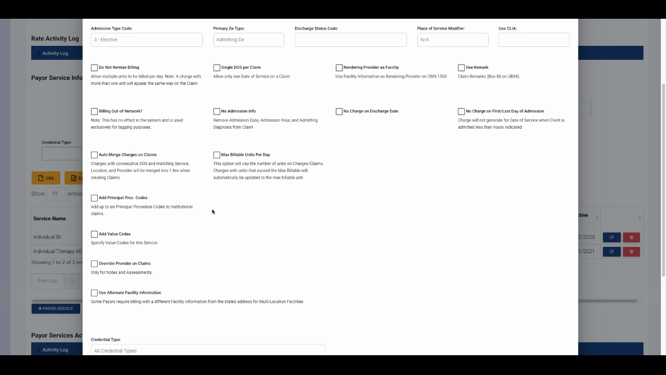
- Claim notes for further details
Step 12: Set the Effective Date for each contract service. Make sure effective dates don’t overlap to ensure the correct configuration applies for every date of service. We also recommend setting a Termination Date for each contract change, though it’s not required.
Step 13: When you’ve finished, click Save in the popup, then save your payer record.
Configured payer service defaults now apply to charges for that payer and service within the effective date range. This ensures billing matches each payer’s requirements every time.
For further help, explore internal documentation or contact support with questions.