
Step 1: Start by adding a contact to the system as an inquiry. This is the first step in the admissions process.
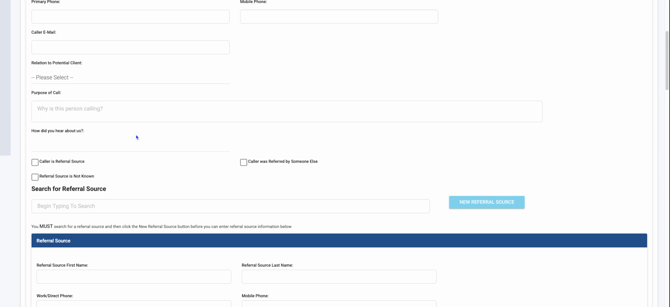
Step 2: Scroll to the top of the page to enter the caller's name and a primary phone number.

Step 3: If available, add the caller's email address and their relationship to the potential client. For simplicity, if the caller is the client themselves, select 'self'. This ensures all relevant information is correctly linked and displayed below.
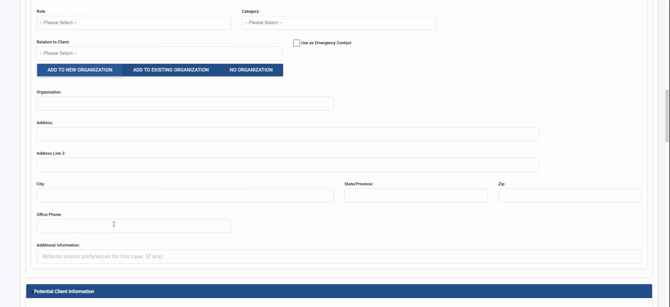
Step 4: Specify the purpose of the call and how the caller heard about your service. Determine if the caller is a referral source. If yes, add the referral source information here.
Step 5: Enter the potential client's information. The data entered previously will automatically populate relevant fields here. It's crucial for billing and utilization review purposes to include the client's address.
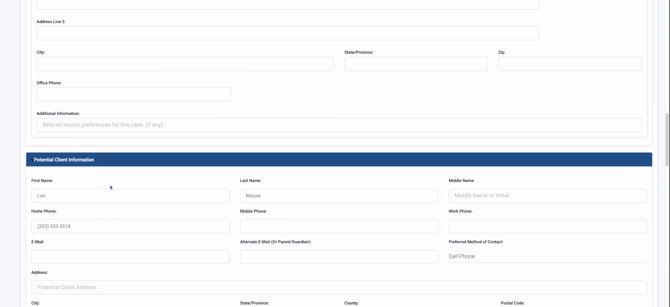
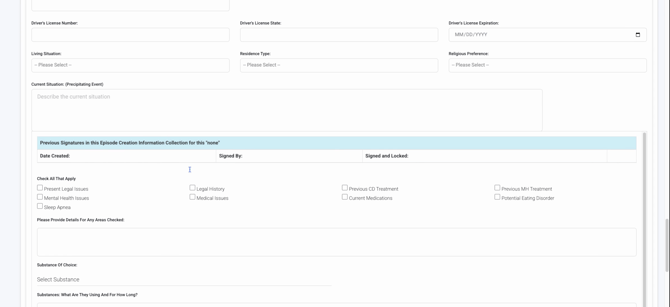
Step 6: Continue filling in the potential client's details such as date of birth, which is vital for calculating the age automatically. If the client is a minor, verify their age. Also, select the birth gender as either female or male, which is important for claims and billing.
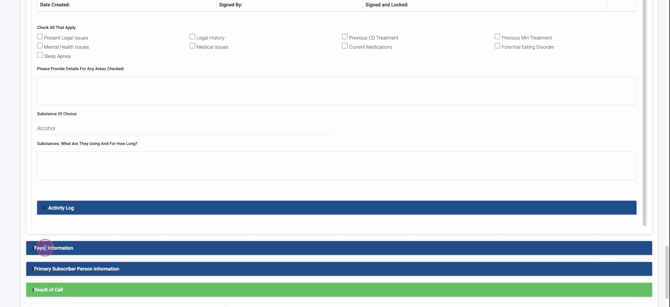
Step 7: Finally, select the substance related to the client's inquiry. This helps in categorizing and managing the case appropriately.
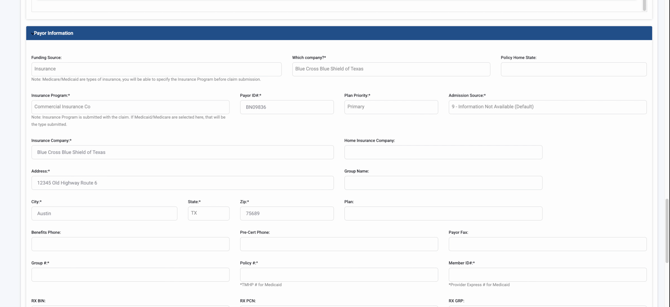
Step 8: Ensure you select the correct payer information. This is crucial as only insurance information is visible to the utilization reporting and teams.
Step 9: When entering the company name, use the drop down menu to ensure it populates the payer ID number correctly. This is essential for the billing process and for the utilization reports (UR) dashboard, census, and inquiry sections to function correctly.
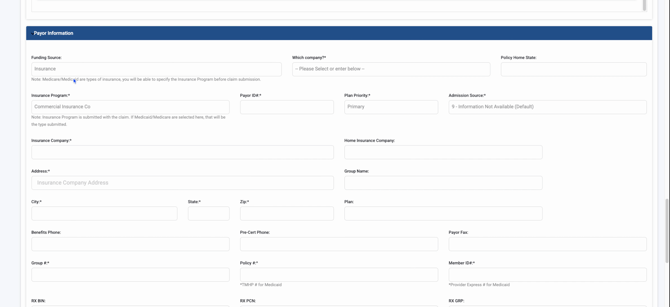
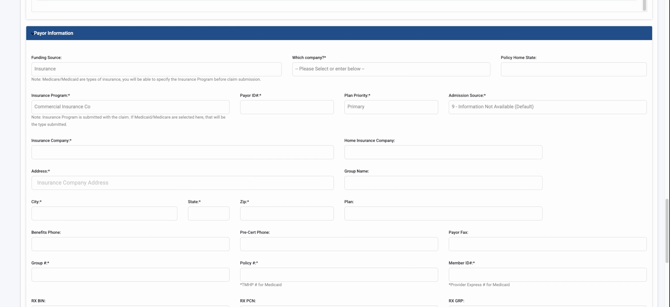
Step 10: If the payer information is not selected from the company Dropdown, the billing team will face difficulties in populating claims and adding payer ID information, which is necessary for electronic claim submissions.
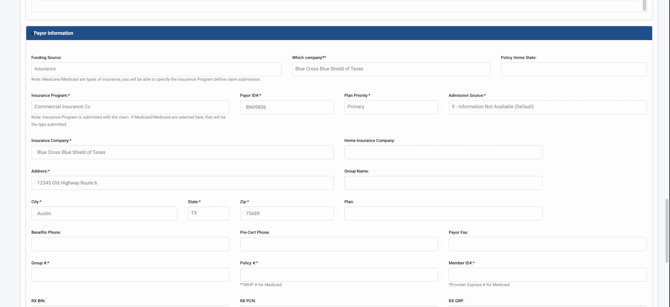
Step 11: Collect and enter the address from the insurance card, typically found on the back. Also, include any group name, plan name, benefits phone number, fax number, group number, and member ID number as these details are crucial for authorization processes.
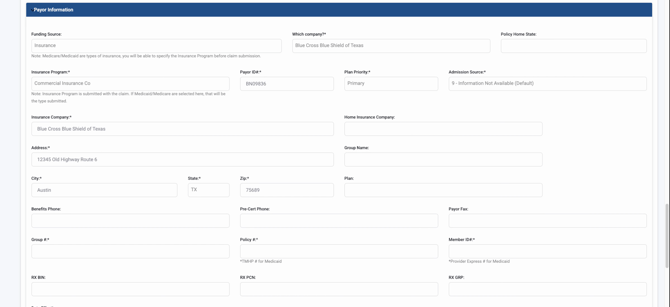
Step 12: Input the effective date of the policy. Move to the section for the primary subscriber information. If the insurance is under a parent or another individual (for minors or dependents), ensure to input their information correctly so the utilization team can acquire the appropriate policy and secure an authorization.
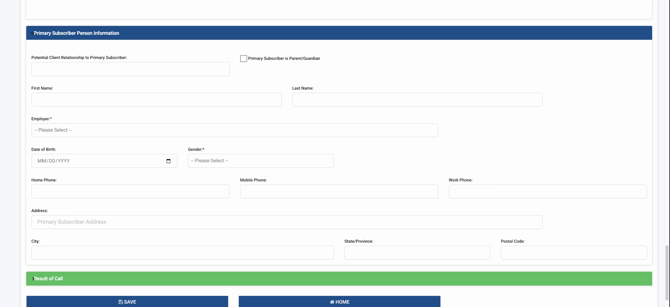
Step 13: Finally, record the outcome of the call by selecting the appropriate result of the contact from the available options.

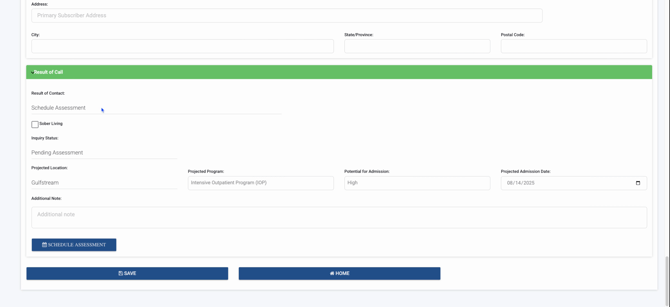
Step 14: Schedule an assessment for a patient by selecting their projected location and the program they might enter. Determine the intensity of the program (high, low, moderate) and set the projected admission date.
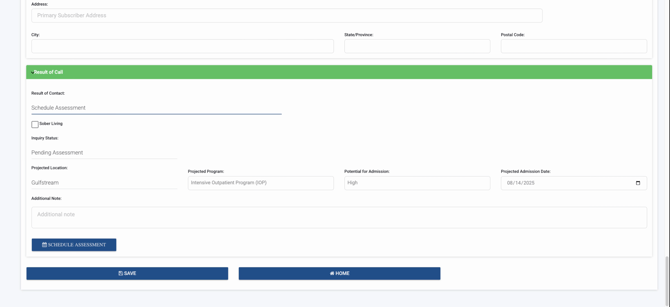
Step 15: Save the information by clicking Save. This action converts the patient's record into an inquiry profile.

Step 16: If the patient is a high priority for an Intensive Outpatient Program (IOP) admission, list the projected admission date. This is crucial from a Utilization Review (UR) perspective, especially if the admission is expected within the next week. This serves as a signal for the UR specialist to initiate the authorization request for the IOP level of care promptly. Add any additional notes necessary for the UR team.
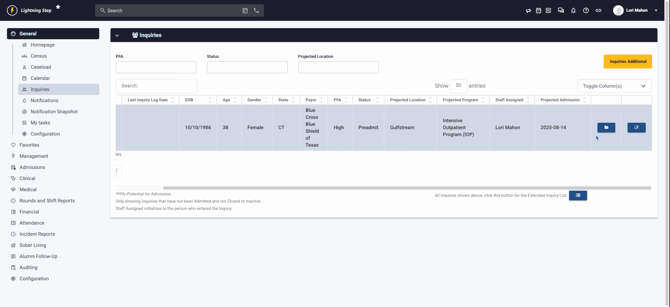
Step 17: Access the inquiry section by clicking the lightning bolt icon.
Then, proceed to the inquiries.

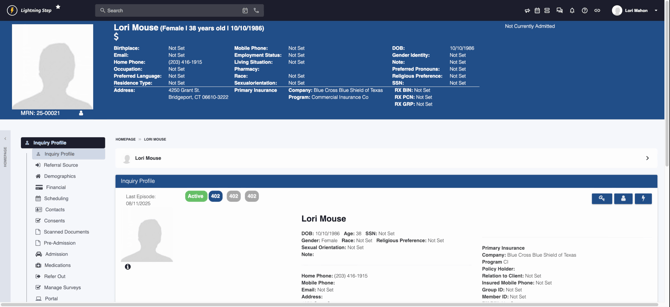
Here, you'll see the patient's details such as date of birth, age, gender, and insurance information. The UR team will also view the patient's PFA status, program type, and other relevant details.
Step 18: Utilize the filter options in the inquiries section to sort the patients based on PFA status (high, low), current status (active, discharged, pre-admit, transfer), and projected location. This helps in organizing and prioritizing the day's tasks.

Remember, it's important to have all necessary information at the inquiry level, as inquiry patients are not visible within the UR dashboard. Only admitted patients appear there. If you need to review, complete, or start authorizations, ensure that these patients are visible in the specific fields.
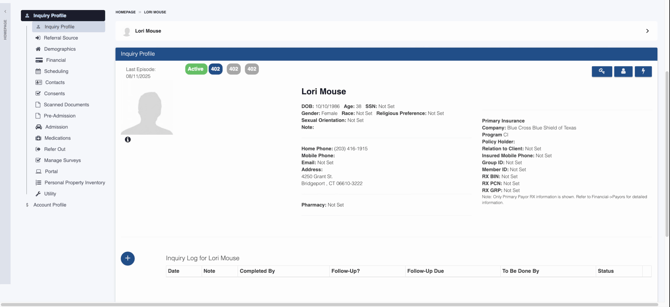
Step 19: For a detailed review, click on the folder icon to go directly into the patient's inquiry profile.
In this view, you can review all related documentations.
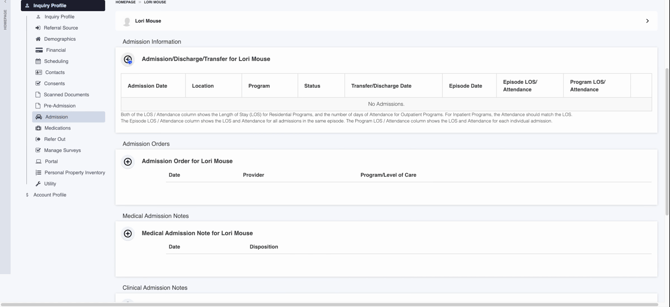
Step 20: To begin the admission process, ensure all pre-admission documentation is complete. Patients are not officially admitted until you press the plus sign.
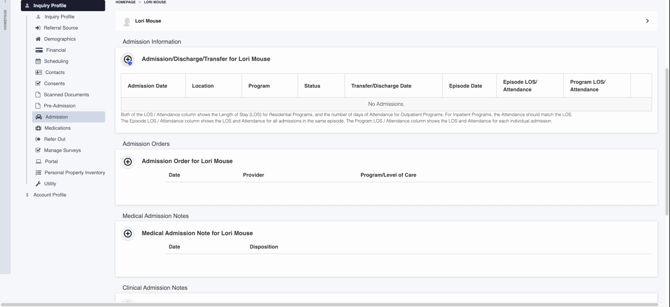
Step 21: If you need to access financial information, demographics, contacts, or any scanned documents, navigate to the respective sections where all this information is available.
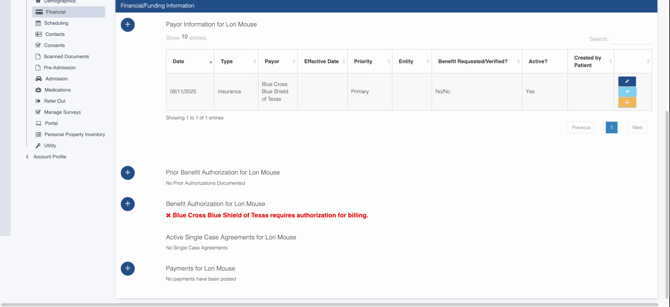
Step 22: To verify that all financial information, including details from Texas, has been correctly populated, return to the financial tab.

Step 23: To add an authorization, such as payer information, prior authorization, or benefit authorization, click on the appropriate option.
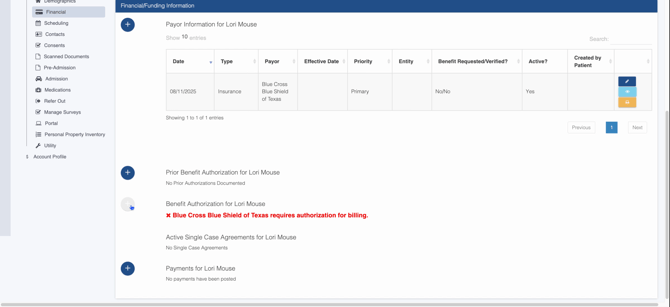
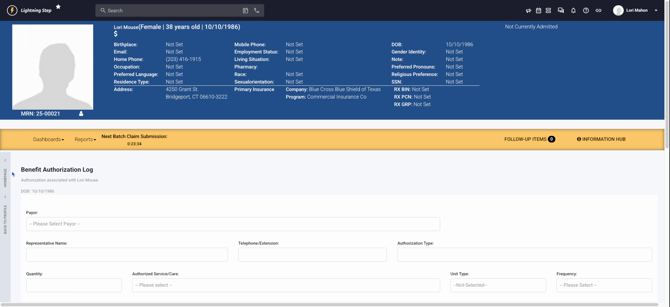
Step 24: Click on the benefits button to access the benefit authorization log. This is where you start the process of obtaining authorization.
Step 25: Continue the authorization process in the UR dashboard for admitted patients, following the same steps as you would for a patient at the inquiry level.
Step 26: To proceed with the admission, navigate back to the admissions section and click on the admissions button.
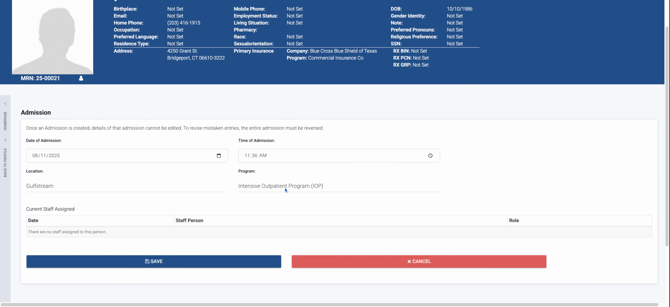
Step 27: Confirm the details, including the admission date and time, as well as the program (e.g., IOP), and then click Save.
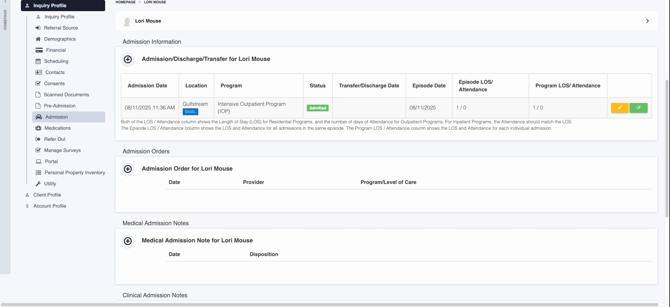
Step 28: After saving, you'll be directed to a screen that confirms the admission status and provides all relevant details.
Step 29: To check the admission status from your homepage, click on the lightning bolt icon, then under the census, search for the client by name.
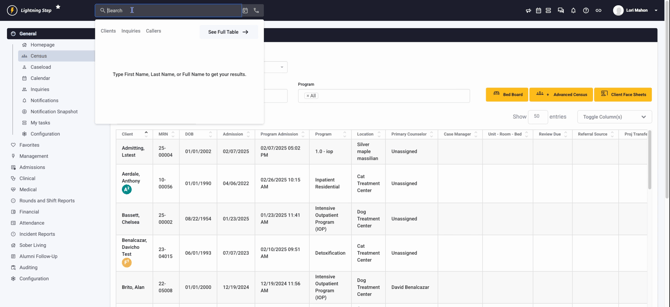
This process ensures the client, Lori Mouse, is now admitted and visible in the census.