
Section 1: Creating an Inquiry, Admission, and Discharge
Follow the standard facility workflow in Lightning Step. Completing each step accurately ensures your WITS reports are populated correctly.
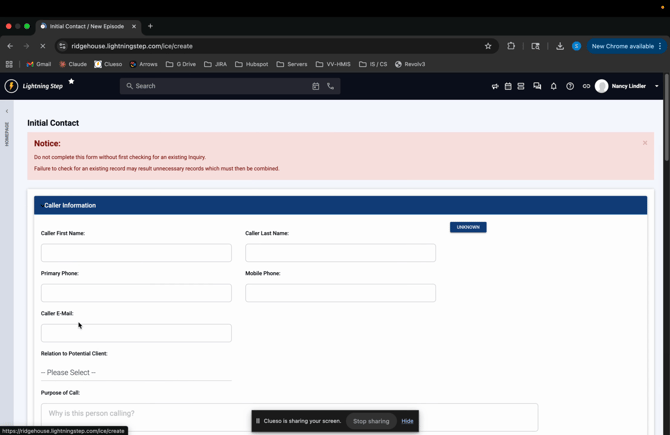
Step 1: Go to Admissions and select Add Initial Contact.
Capture as much client information as possible. The more details you provide now, the less manual entry you’ll need later on your WITS forms.
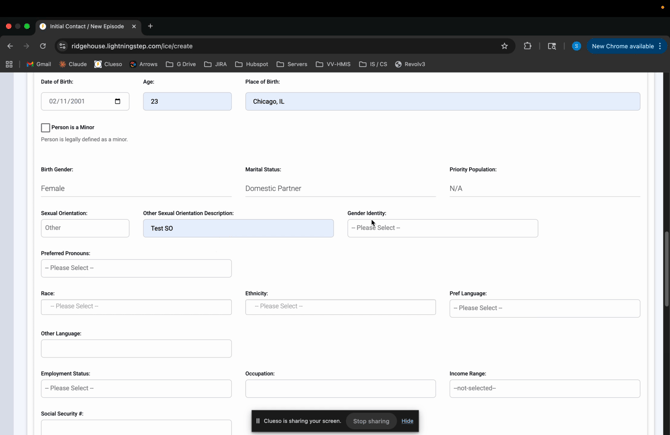
Step 2: Pay special attention to the Sexual Orientation and Gender Identity fields.
If you select “Other,” a free text field appears, allowing you to specify further details—this fulfills recent WITS reporting requirements.
Step 3: Click Save to create the new inquiry.

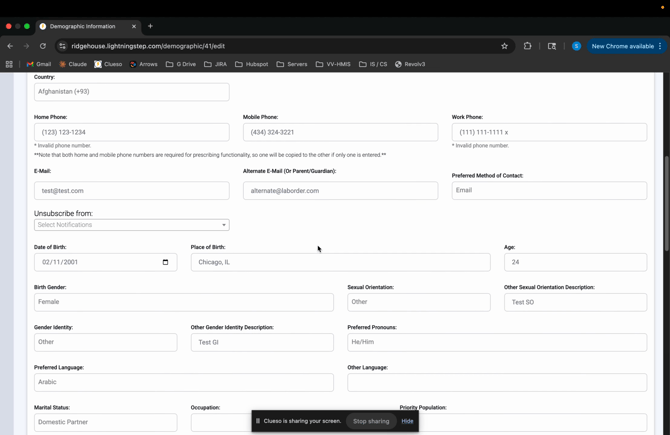
Step 4: Review the new client’s Demographics.
Information from the initial contact form automatically populates this section.
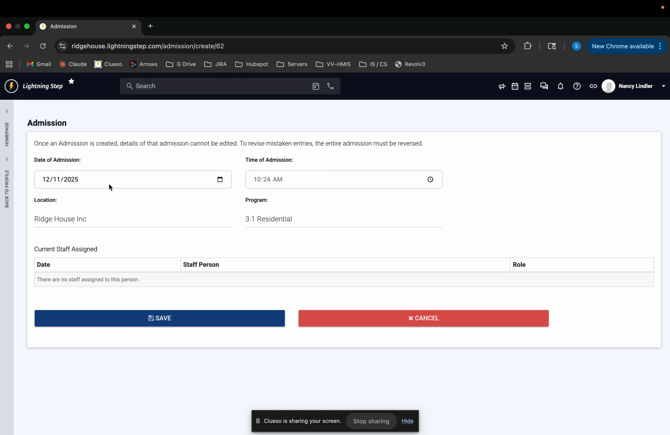
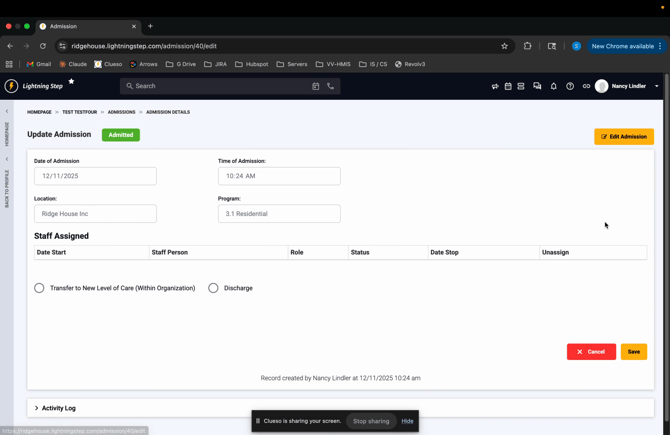
Step 5: When ready to admit the client, navigate to their inquiry profile and select Admission.
Add a new admission and click Save.
Step 6: After completing care, discharge the client.
From the client profile, select Admission and Discharge and proceed to discharge.
Section 2: Creating and Exporting WITS Reports
After completing inquiry, admission, and discharge, you’re ready to generate and export WITS reports.
Step 1: From the homepage, go to Management → Management and Clinical Reports → WITS Reports.
-
This section of Lightning Step is security controlled, so if you do not see this option or receive an error, please notify the Lightning Step team.
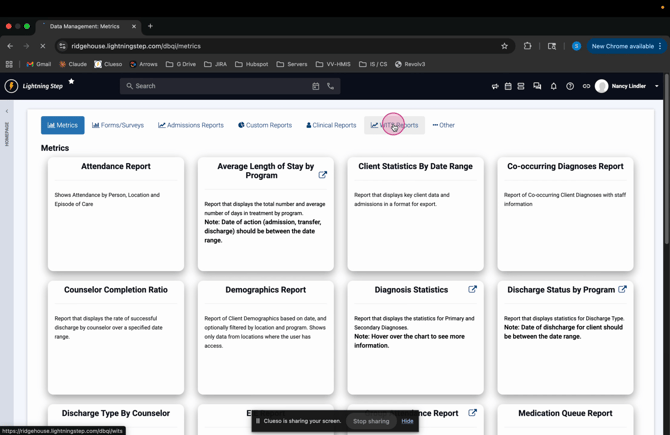
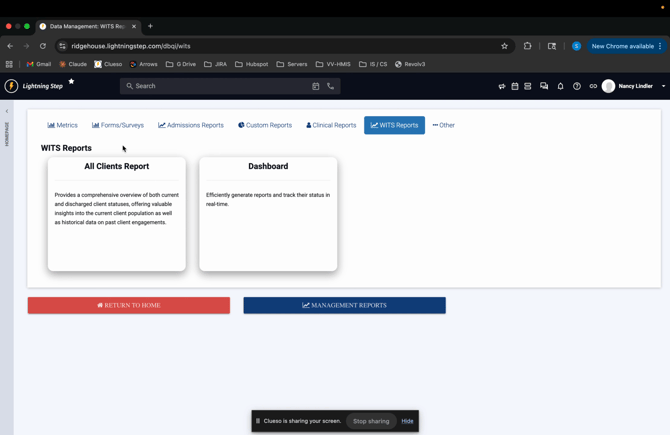
Step 2: You’ll see two main areas:
-
All Clients Report: Complete required WITS forms
-
Dashboard: Bundle completed forms into reports and upload
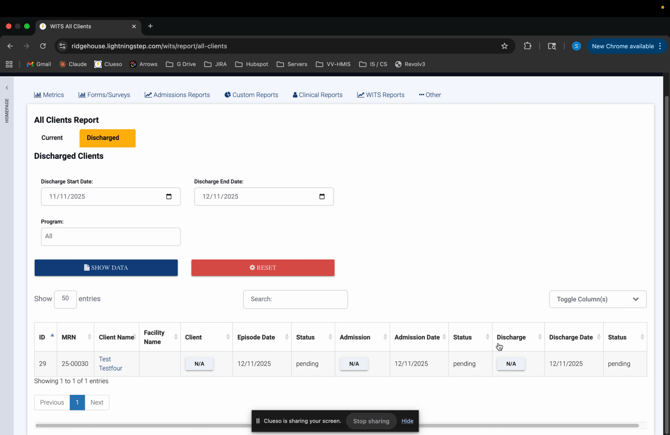
Step 3: In the All Clients Report, search for current or discharged clients by date ranges.
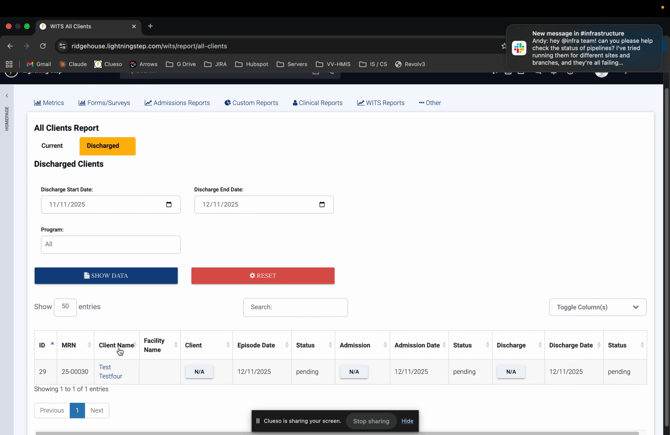
Step 4: Click on the client’s row. Notice three required forms: Client Form, Admission Form, and Discharge Form.
Their status shows as “Not Applicable” until each is finalized.
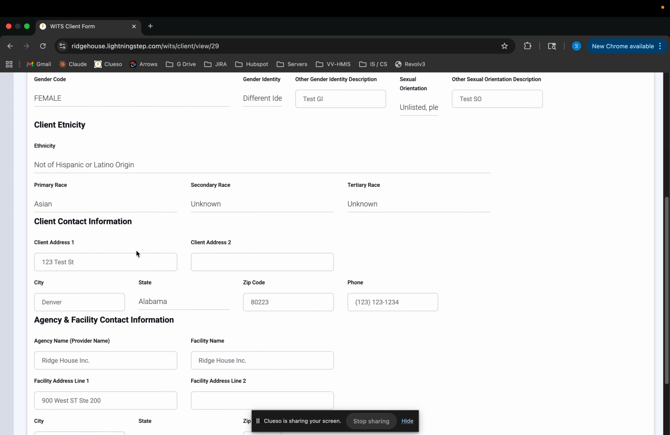
Step 5: Open the Client Form.
Most fields will pre-populated if you successfully captured this data during Initial Contact Creation (inquiry creation). Complete any remaining information.
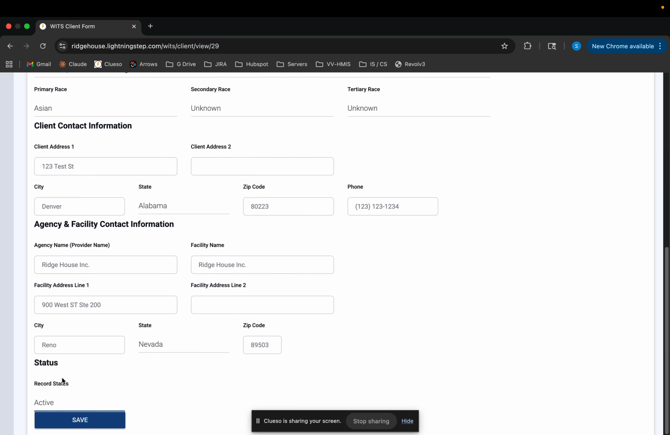
Step 6: Save the form as Active when finished.
-
You will receive an error message if any required information is missing.
-
Once complete, on the All Clients Report you will now see the Client Form listed as "Form" instead of "N/A".
Step 7: Repeat this process for the Admission Form and Discharge Form.
-
Update any required fields, change the status to Active, and Save.
-
Less of this information will be pre-populated on these two forms because this data is not captured elsewhere in Lightning Step.
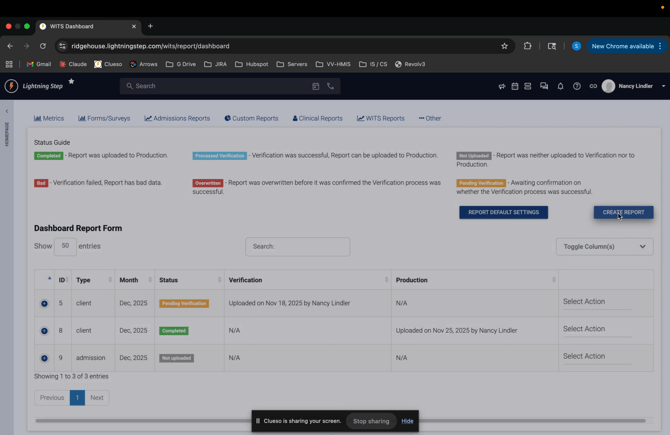
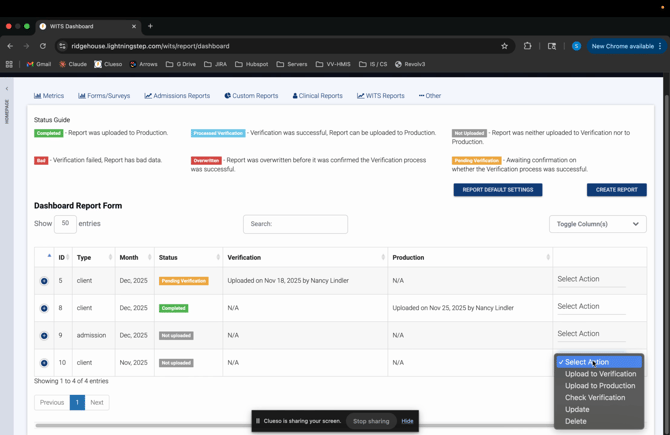
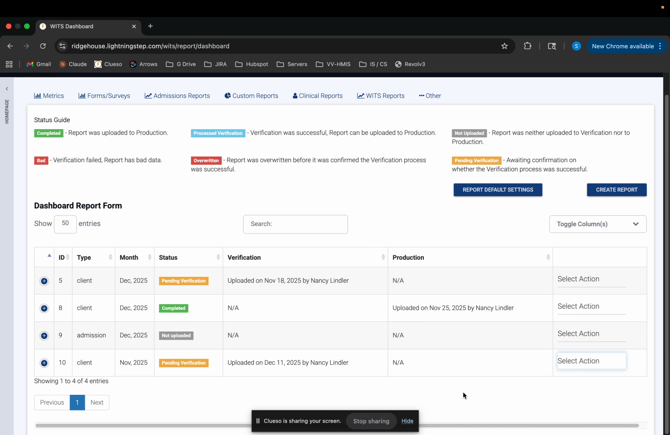
Step 8: Once all forms are complete, go to the Dashboard to create a report.

Step 9: Click Create Report.
Choose the type of report, set a date range, and select the client(s) to include.
-
Report Type
-
Client, Admission, Discharge
-
These need to be submitted as separate reports
-
-
Date Range
-
You can search for all clients (with completed forms) by month, as WITS requires reports on a monthly basis
-
-
Select Clients
-
When you set the date range, the system will automatically pull in all clients from that date range (if their forms were completed)
-
Step 10: Click Save.
Your bundled report appears in the dashboard below, with a status "Not Uploaded".
Step 11: To submit for verification, click Upload to Verification on the right.
-
You will see a confirmation pop-up once the upload is successful.
-
You will also see the status of the report change from "Not Uploaded" to "Pending Verification".
Step 12: Wait for an email notification from WITS.
-
You should receive an email notification from WITS indicating receipt of your verification file.
-
You can now select "Check Verification".
-
If the file was successful, the status will change to Processed Verification.
-
If it was unsuccessful, you will see an error message indicating what needs to be fixed.
-
-
When the status updates to Processed Verification, the "Upload to Production" option becomes available.

Step 13: Click Upload to Production.
A pop-up confirms a successful upload and the status changes to Completed.
Repeat this reporting process monthly for each required form type.
Managing inquiries, admissions, discharges, and WITS reporting in Lightning Step allows you to meet the WITS regulatory requirements. If you have questions, always feel free to contact the Lightning Step support team.
Please note that some questions will need to be directed to your WITS contact instead.