
Link to IDP and TFA Documentation Guide
Below is an article and video from the January 2026 Demo Day where the functionality was gone over.
Prerequisite 1: To create a new JSPOP clinic, click Add Clinic under Lightning Stock Locations. With this release, all clinic creation happens inside the app.
Prerequisite 2: Enter clinic information as prompted. Mandatory fields must be completed before saving.
Prerequisite 3: As you log in or access the clinic for the first time, you’ll see the updated identity proofing flow. This streamlined process helps clinicians and admins alike.
Identity Proofing (IDP)
Step 1: To begin identity proofing for a provider, navigate to a client profile. If the provider will not prescribe controlled substances, only standard identity proofing is required. If a DEA number is present in their DoseSpot profile, the system automatically prompts for TFA.
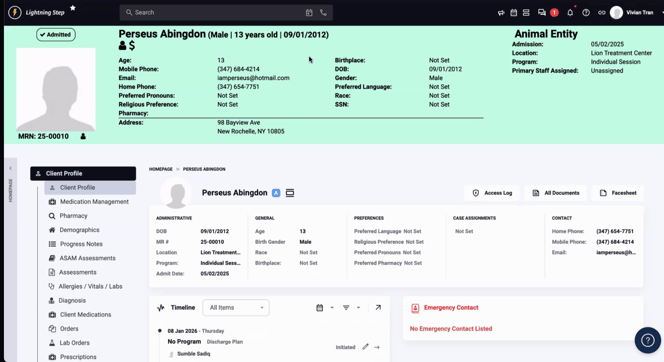
Step 2: Open the client profile and go to Med Management. The system prompts the clinician as soon as they land here.

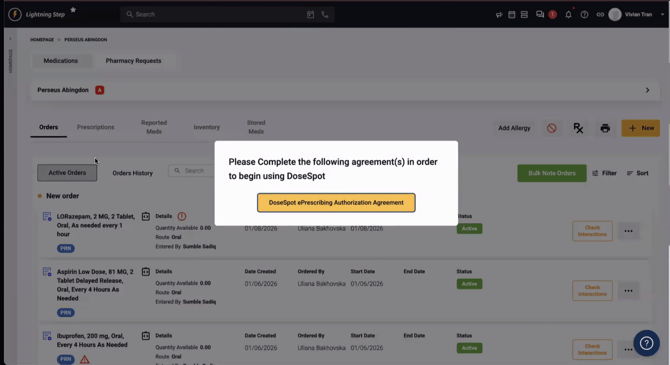
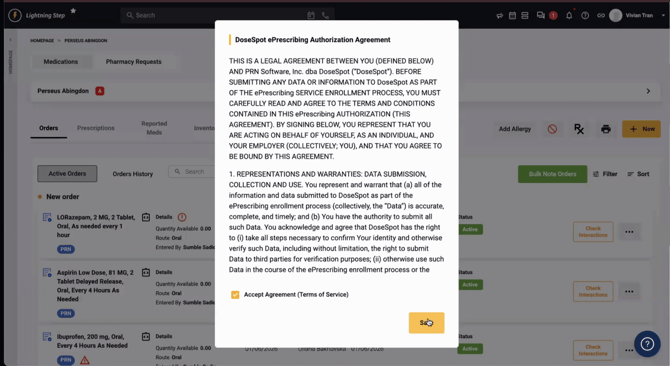
Step 3: Complete the Dose Amount Agreement when prompted.
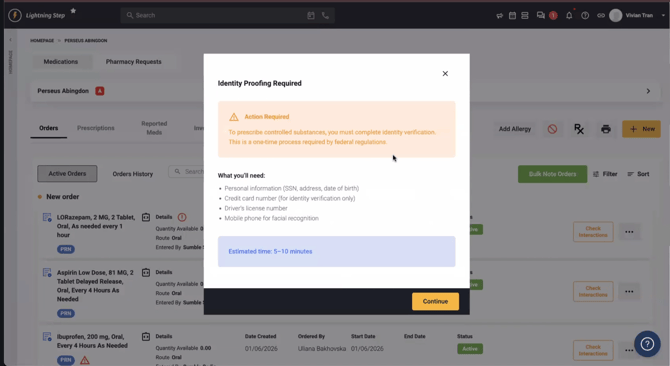
Step 4: Start the identity proofing step.
If the provider leaves before finishing, returning to the page will display a pop-up reminder to complete identity proofing.
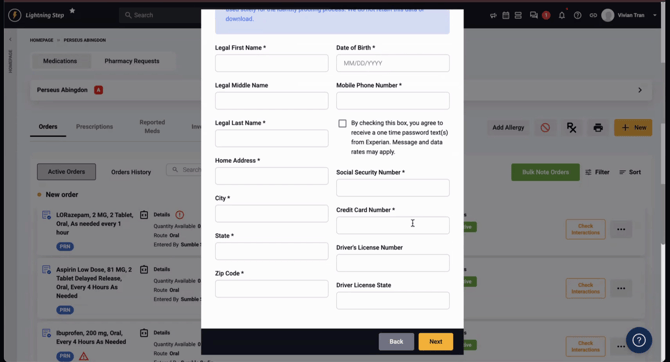
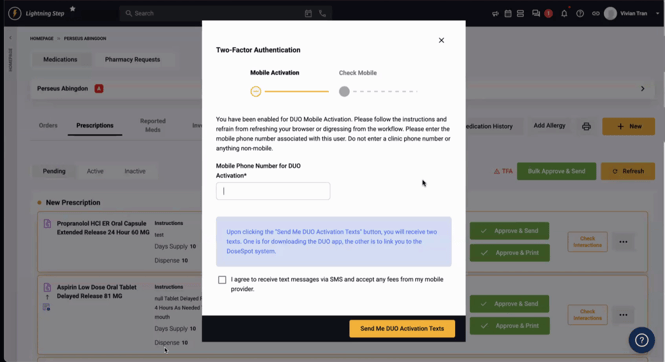
Step 5: Remind clinicians to have their driver’s license and the following info ready before starting:
-
First and last name
-
Address, city, state, ZIP code
-
Date of birth
-
Personal mobile number (for receiving a text)
-
Social Security number
-
Credit card number (required for soft credit pull)
Experian will perform a soft credit pull, and if the provider’s credit is frozen, they’ll need to unfreeze it before continuing.

Step 1: Fill out and submit all required fields in the form. If Experian requires the full nine-digit ZIP, use the extended format provided.
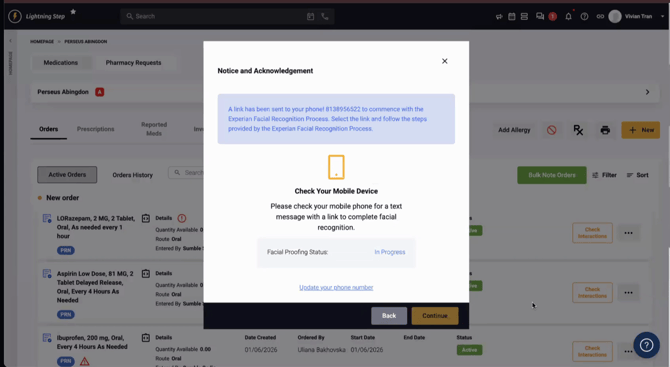
Step 2: Providers receive a secure text message from Experian and complete a facial recognition check using their phone. Have a driver’s license ready for upload.
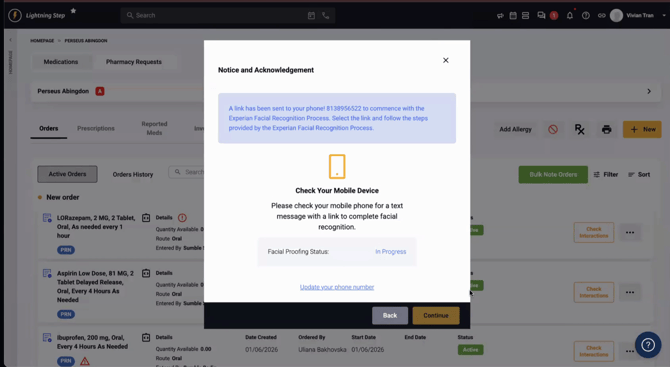
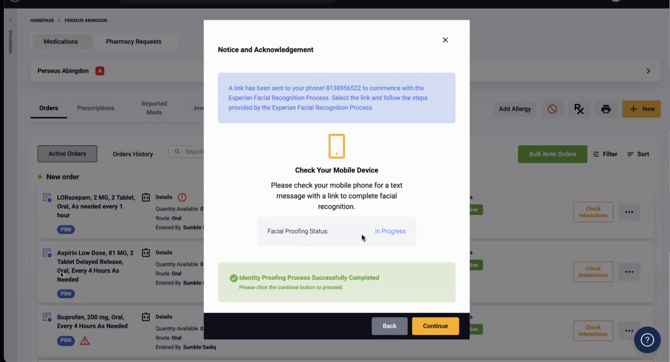
Step 3: After submitting, the system checks the status every 15–30 seconds. When complete, you’ll see a confirmation popup.
Facial recognition may not always be enforced, depending on current Experian requirements.
Step 4: If identity proofing fails or can’t be completed, follow the offline process via ID.me. DoseSpot support can guide providers and supply a step-by-step recovery guide. Providers get three attempts for Experian questions—if all fail, submit a ticket with DoseSpot.
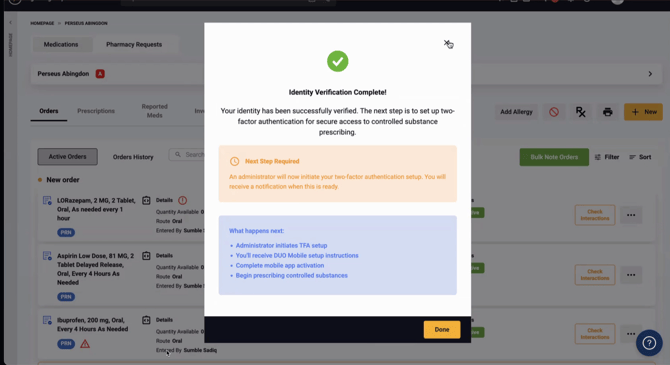
Step 5: Once identity proofing is successful, click Continue to proceed. If controls prescribing is enabled (DEA number present), the system prompts for TFA setup.
Best practice: Encourage clinicians to complete the full process—including TFA—in one session to avoid prescription roadblocks.
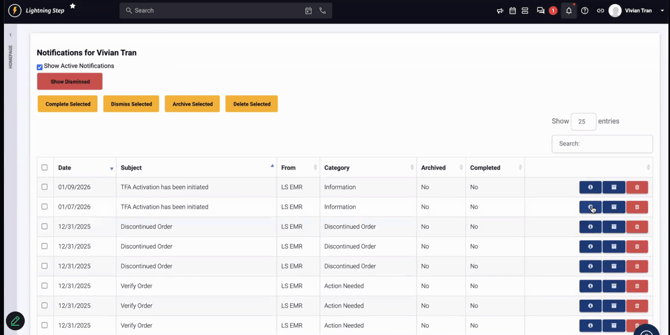
Step 1: Clinicians waiting to finish TFA can resume anytime from the Prescriptions tab, where an icon indicates status.
Step 2: Only users with the EPCS coordinator role in Go Spot can initiate TFA. In single-provider clinics, assign both roles to the clinician if needed. Choose the correct coordinator from the drop-down to start TFA.
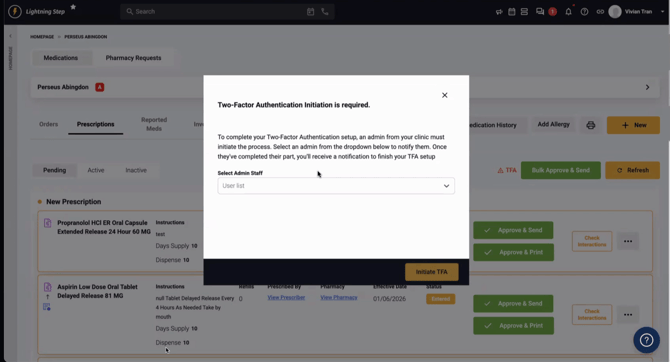
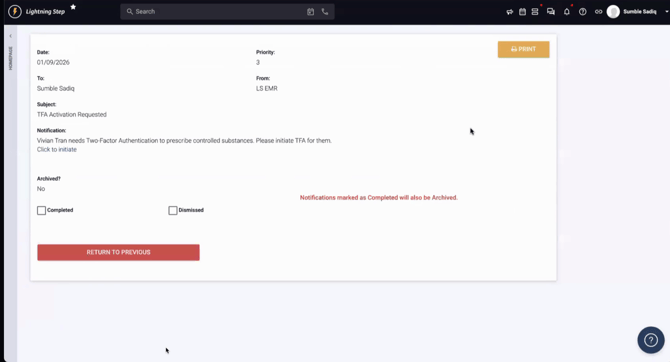
Step 3: The ISO user receives a TFA activation notification and initiates authentication for the clinician.
Step 4: Assign the EPCS coordinator role in DoseSpot user admin or admin console as needed.
Step 5: When TFA is initiated, the system displays a notification and allows the workflow to continue.
Step 6: If DUO isn’t already set up, enter the phone number to receive authentication texts. Enter the TFA code and PIN to finish setup.
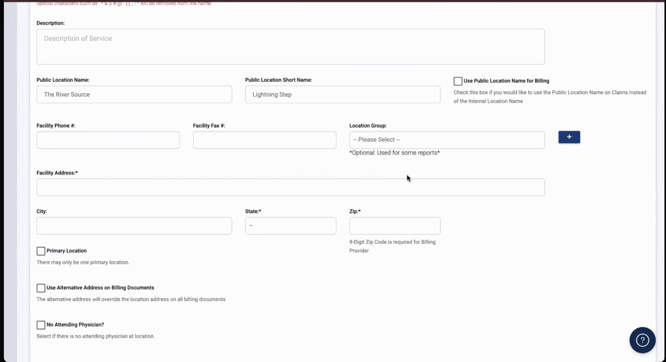
Step 1: To create a new DoseSpot clinic location, click Create Location in the Locations module. Double-check if you’re adding or updating.
Step 2: Spot the new “Is DoseSpot Clinic” column in the Locations list. This helps track which locations are enabled.
Only users with DoseSpot admin access—such as Implementation or Support staff—can create DoseSpot clinics. Customers must submit support tickets for this setup.
Step 3: Enter all required information: location name, phone number, address, city, state, ZIP code. Omitting mandatory details (like phone number) will block the process and surface an error.
Step 4: When saving, DoseSpot assigns a unique, non-editable clinic ID and key to ensure consistent configuration.
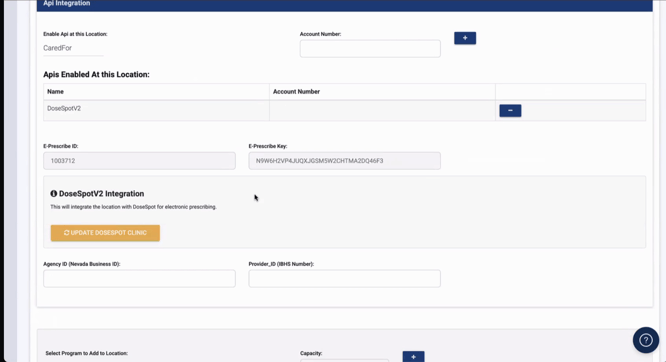
Step 5: Verify the new clinic appears in the Toastpad admin console and that the creator is automatically listed as a DoseSpot user.
Adding the creator as a user doesn’t impact licensing—only client admins (users with administrative access in Lightning Step) can create and manage clinics.
Customers do not have access to these admin settings.
With these updates, identity proofing, two-factor authentication, and clinic management are simpler, faster, and fully centralized. Stay within the app for all major workflows, and remember: complete identity proofing and TFA in one session for the best experience. For any questions or workflow issues, check the in-app guides or reach out to support.